First of all, setting up an AirTag couldn't be easier. However, there are a few steps and decisions involved - we'll walk you through the process, so let's get started.
An AirTag starts working the moment you completely remove the plastic protective cover from the device. The last part of the cover prevents the battery connector from working. Pulling off this part starts the little accessory from Cupertino. This is great for reasons of convenience during setup and security, because where there is no on switch, there is no off switch either. But it also means that the life of the AirTag battery decreases as soon as you remove the protective cover. According to Apple, the battery life should be about a year. As soon as this runs out, the smart tracker will make itself felt. Replacing it does not require any technical know-how at this point. All you have to do is insert a new button cell battery. Be that as it may - one more thing in advance.
Setting up AirTag – these points are required
Before you start setting up your AirTag, you should check the following points:
- Please make sure your iPhone is running iOS 14.5 or later.
- If you haven’t already done so, enable “Find My” in Settings -> “Your Name” -> “Find My”.
- Now turn on Bluetooth.
- Also enable location services in Settings -> Privacy -> Location Services.
- If you are using an iPhone 11 or iPhone 12 model, then you have a U1 chip. This allows you to get more precise location tracking, but it must be activated. By default, it is probably already switched on. But a look at the settings can't hurt at this point. So open your iOS settings again and tap on the "Privacy" section. Now navigate to "Location Services" and then select "Find My". Now make sure that "Precise Location" is activated.
Setting up AirTag – here's how
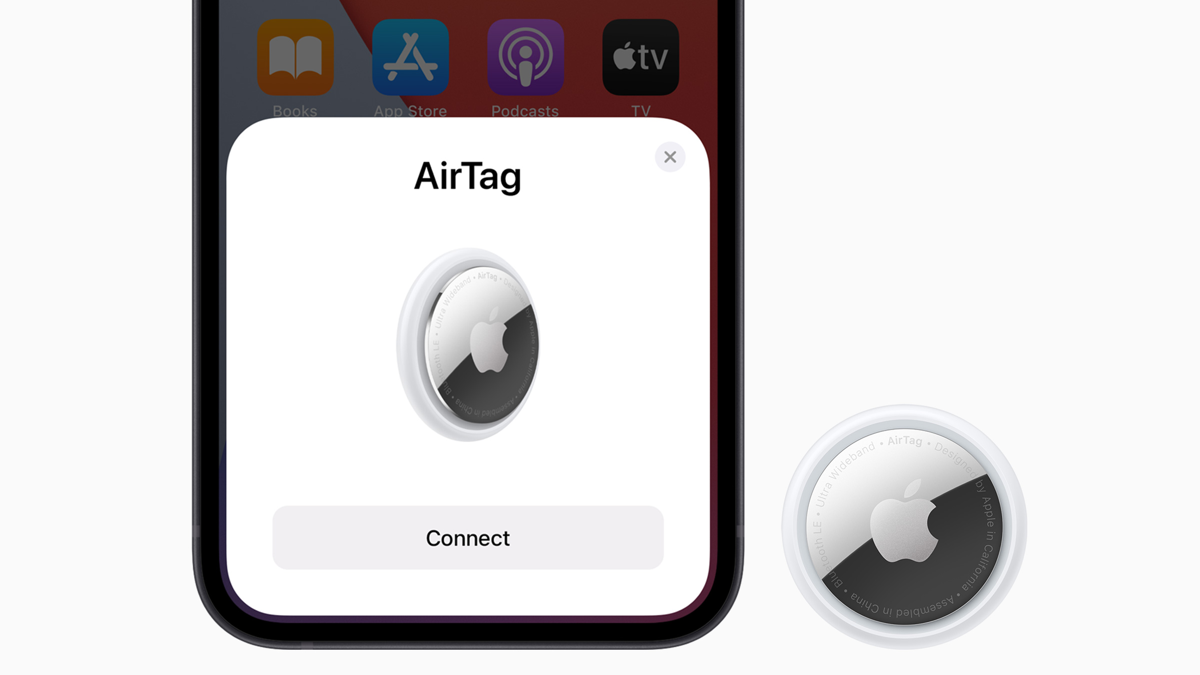
Now your iPhone is ready to use an AirTag, so peel off the plastic cover and hold the AirTag close to your iPhone. When the iPhone detects that an AirTag is present, it will appear in a similar way to the AirPods screen. Now tap "connect". Once you've done that, you'll need to name your AirTag so you can distinguish it from the others later.
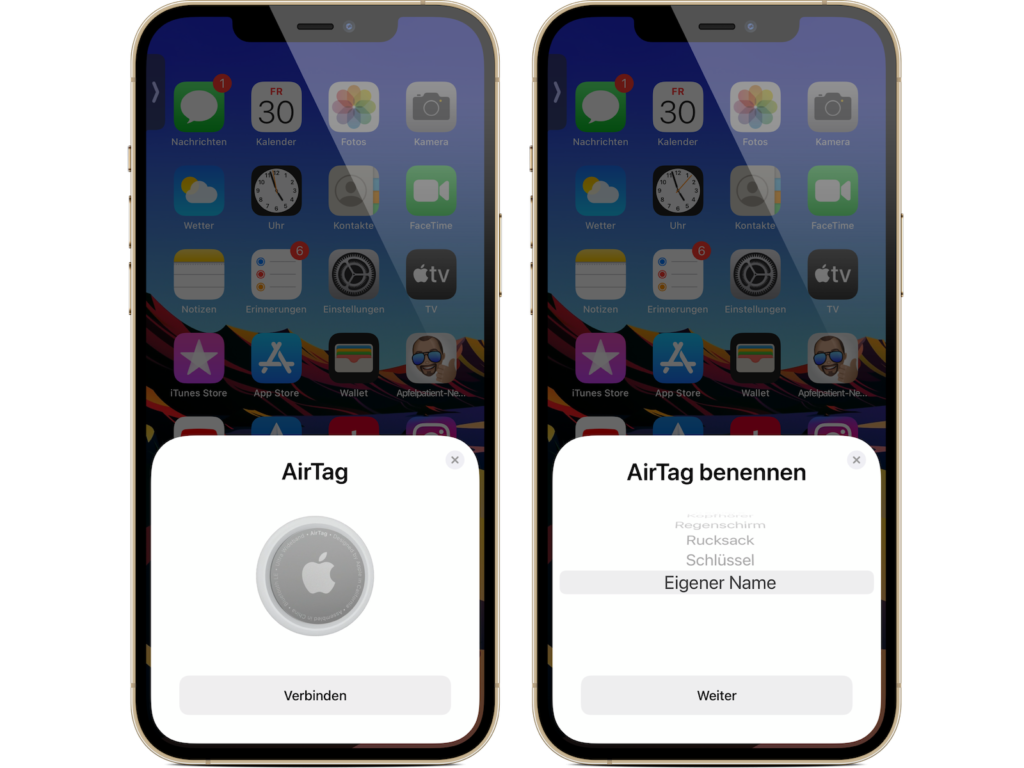
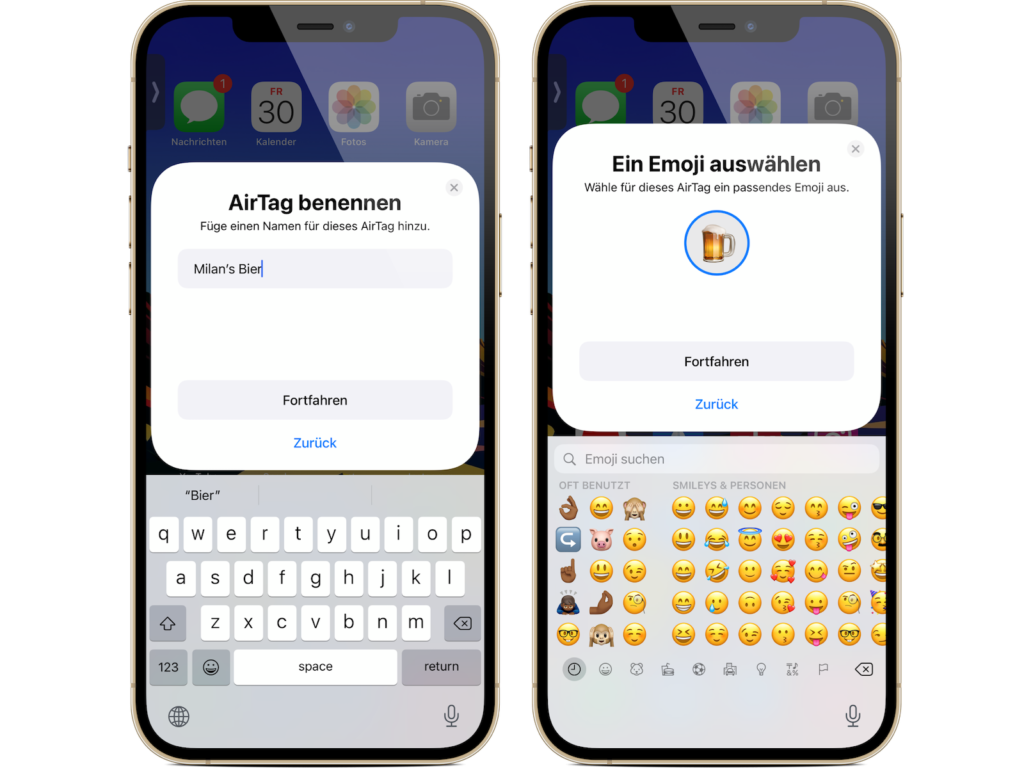
Either choose from the list of suggestions (backpack, keys, etc.) or tap "Own name". You can then select a suitable emoji.
Once you've completed this part, press "Next". You'll now be asked to register the AirTag with your Apple ID. Confirm and wait a moment. A short introduction with the most important points should now appear - this means the setup is complete. At this point you can tap "Done" or switch to the "Find My" app.
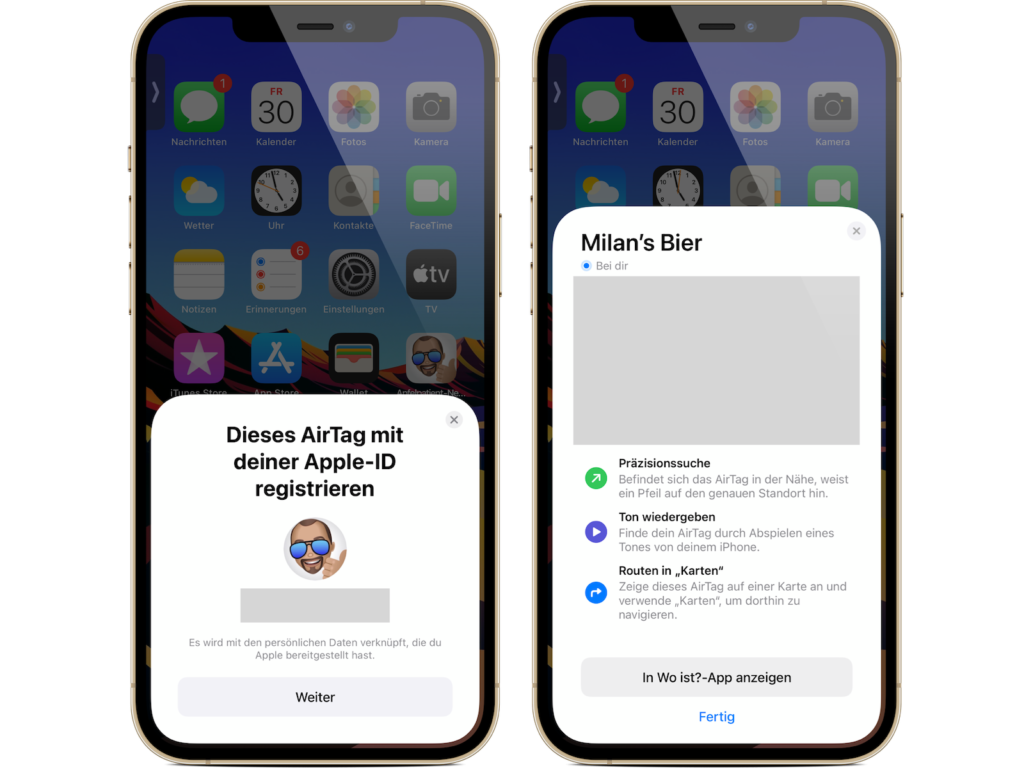
AirTags are clearly displayed in the "Find My" app
If you now want to see an overview of your set up AirTags, you have to do this via the "Find My" app and go to the "Objects" section. Find the name of the AirTag and tap it. From here you can interact with it. More tips about AirTags will follow shortly. Until then, we hope you have fun with your new accessory. Are you looking for suitable AirTag cases? Then take a look at Amazon. In our AirTag list you will find the trackers and accessories from Apple and third-party suppliers - enjoy browsing. (Image: Apple)